
3D prints typically all come out showing a hint of layer lines, but now a totally smooth surface finish is possible with the introductions of acetone 3D print smoothing.
What is it?
One of the many things that fused deposition modeling (FDM) 3D printers lack is a smooth finish. Instead, you often get a matte and rough finish with visible layer lines. A popular way to remove these lines is to sand and fill until the surface is smooth. The downside to this method is it requires a good amount of time to get anywhere close to a smooth surface.
Another method that's not only faster but better at preserving accuracy is acetone smoothing. Acetone smoothing can be applied to any material that can be dissolved in acetone. The most popular filament to smooth this way is ABS. Below are the steps and process of smoothing with this method.
What you'll need
- Towels
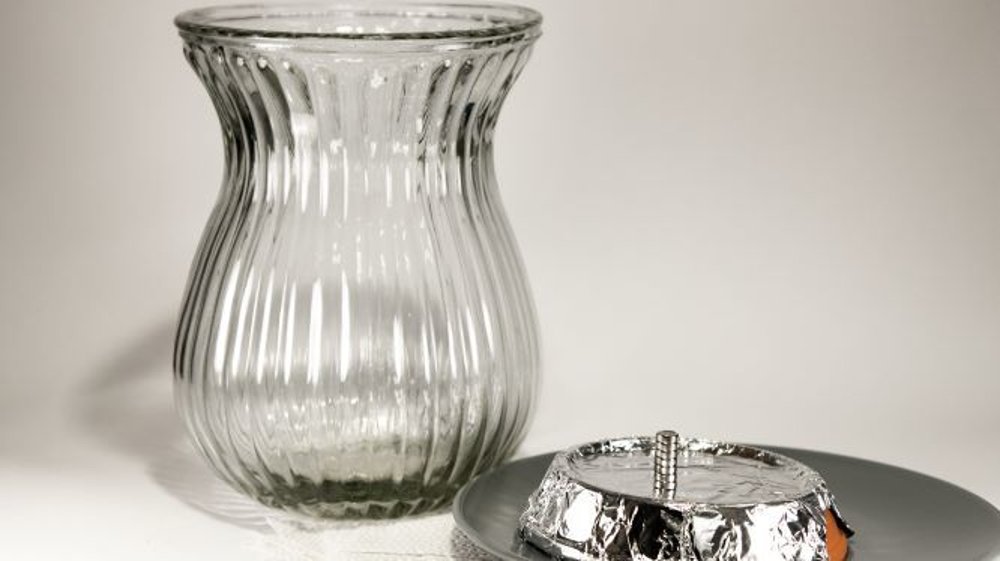
- One transparent glass vase (a glass jar also works fine)
- Magnets (at least six)
- A plate
- A small clay saucer (any structure that acts as a platform will do)
- Acetone
Optional:
- Aluminum foil
Word of Caution
Acetone is an amazing tool that can be used for a variety of reasons. However, acetone can be very dangerous if used incorrectly. Acetone is flammable and should not be used near an open flame. It's best to work in an open environment to avoid breathing in the vapor. Side effects can be headaches, dizziness, and a sore throat.
Smoothing Steps
Now that you've prepared, you can finally start acetone smoothing your 3D prints.
1. Fill the plate with water and place the clay saucer on it with the flat side facing up. We have added a layer of aluminum foil on top of it so that the model doesn’t stick and so that we keep that shiny surface from printing on a glass bed.
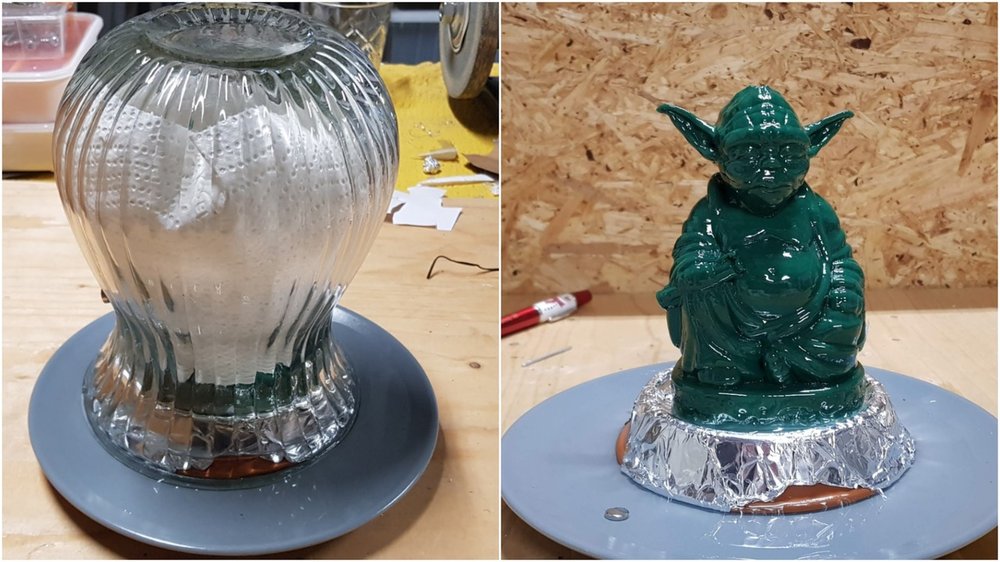
2. Attach the tissues to the inside of your vase with the help of the magnets. Then soak the tissues by pouring in small amounts of acetone and rolling the vase until everything is covered.
3. Place your 3D printed model on the platform (clay saucer) and slowly lower the upside-down vase over it. It’s important that the water on the plate makes a seal so that the acetone won’t leak. In the beginning, you will see some bubbles coming out from the water, this is normal and nothing to be afraid of.
4. Now you just have to wait until the layer lines have disappeared. It can take anywhere from half an hour to a couple of hours. (The Budda Yoda took just under two hours.) If you choose a transparent vase, it’s much easier to see the progress of your smoothing process (where there is no tissue) without guessing or having to remove it.
5. When you're satisfied with your print, you can carefully remove the vase and remove the print from the platform. Place it on something that doesn’t react to acetone. We recommend using a failed PLA print, preferably the ones that have stopped mid-print and left behind a flat surface with infill acting as an anti-sticking platform.
6. The last step is to let your print dry from any acetone leftovers. Which can take 1 to a few days. When the part has been cured, you now have a 3D printed part that looks like it was injection molded.