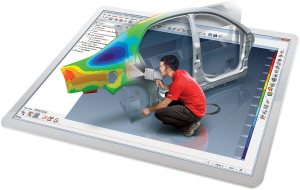
PolyWorks Inspector
A Powerful 3D Metrology Solution PolyWorks Inspector provides users with a powerful 3D metrology solutions, allowing them to:
- Control and edit the dimensions
- Identify and correct errors before manufacturing & assembly
- Receive real-time measurements for guiding assembly build
- Supervise product/part quality by using 3D scanning & portable CMM devices
Get Your Alignment Right
Without the proper alignment of a part or product, inspection and analysis of the measure part or product is impossible. Measured parts are typically aligned to their nominal CAD models, allowing for both the measured and nominal dimensions to be extracted and compares. Virtual assembly to surrounding mating parts is also made possibly through alignment, allowing users to check for any interference, as well as analyze both flush and gap deviations. PolyWorks Inspector provides a number of alignment features, enables users the ability to perform alignments with:
- Features: 3-2-1, pairs of center points, and GD&T datum reference frames
- Cross-sections or Surfaces: measured-to-nominal best-fit, constrainable in rotation/translation, and within tolerance zone
- Reference Points & Lines: RPS, surface points, and six-point nest
- Virtual Gauges: caliper, flush & gap, and airfoil
 Extract All the Dimensions Required
Extracting the dimensions of measured parts and computing deviations in relation to the nominal parts dimensions make up the core of the workflow for PolyWorks Inspector. With the incredible flexibility of PolyWorks, parts dimensions can be extracted from point clouds, polygonal models (from point clouds), or probed points. In addition to this, the nominal dimensions can be extracted from either a reference measured part or a CAD model. Equipped with real-time guidance, PolyWorks Inspector is also able to aide users in accurately building and inspecting jigs and fixtures using only single-point measuring devices.
PolyWorks Inspector provides users with all the extraction and analysis tools needed:
- Advanced dimensions such as flush and gap, profile radius, airfoil dimensions (leading edge, trailing edge, and global), assembly clearance, thickness, and more
- Feature dimensions and GD&T controls (ASME Y14.5-2009 and ISO 1101, as well as PTB certified 64-bit/32-bit)
- Surface, boundary, and cross-sectional measured-to-nominal deviations
 Generate Powerful & Updatable Reports
PolyWorks Inspector generates powerful reports thanks to its revolutionary updateable reporting technology which guarantees the accuracy of its reports and greatly increases the speed of multi-piece inspections.
Any report items – ranging from 3D scene screenshots to result tables – are automatically updated as a project is altered. In addition to this, users also have the ability to change the project’s parameters and switch out the measured data points of a current piece with a new piece’s data points.
Users can even share their inspection results globally using PolyWorks Viewer

Revolutionary Technological Features
- Universal 3D Metrology Design: The architecture of PolyWorks allows for the integration of manually-operated & numerically-controlled digitizing of the point cloud and 3D measurements from single-point probing technologies within one common infrastructure. This revolutionizes universal inspection and enables the exchange of useful information between devices.
- High Quality, Real-time Meshing: This technology converts 3D scan data from laser scanners into a intuitive metrology process through the real-time creation of polygonal models for products and parts. In addition to this, the real-time quality meshing feature also identifies ineffective scanning methods by identifying quality metrics. This allows users to improve the quality and accuracy of their measurements and provides measurement repeatability.
- Automatic Inspection Updates: The built-in traceability features enables operators with the ability to modify parts or product parameters, replace objects and/or change the spatial relationship between 2 different objects. These changes are automatically updated for the entire project – including the 3D geometry and inspection reports. Ultimately, this helps to avoid expensive errors and saves users a significant amount of time.
- Play Inspection Tool: Replace time-consuming teaching modes with this powerful tool. The Play Inspection tool significantly simplifies the measurement process of multiple part pieces by automatically producing a real-time, step-by-step sequence in order to capture 3D data-sets for a new piece. This is done using point-cloud digitizers and portable probing devices.
